
 I have just finished an installation process of SQL Server 2016, and in post-check I’ve verified that I’ve installed the instance with a wrong collation setting.
In this tip I will explain step by step how to change the server level collation setting for an existing SQL Server instance.
Step 1
Stop the all SQL Server related services
Step 2
Open a Command Prompt and Navigate to the Binn Directory
Step 3
Apply a New SQL Server Collation
Execute the command below: a lot of information will appears and no user action is required.
sqlservr -m -T4022 -T3659 -s"SQL2016" -q"SQL_Latin1_General_CP1_CI_AI"
Att.: The parameter “-s” is only necessary if more than one SQL Server instance exists on the target machine.
Att.: SQL_Latin1_General_CP1_CI_AI is the new collation.
Step 4
Restart all Sql Server related services
In my setup in Step 3 I get an error “Unable to initialize SSL encryption because a valid certificate could not be found, and it is not possible to create a self-signed certificate“.
To solve follow the next steps.
Step 1
Install (if not exist) IIS
Att.: This step without IIS it is more difficult !!! At the end if you do not need you can uninstall it !
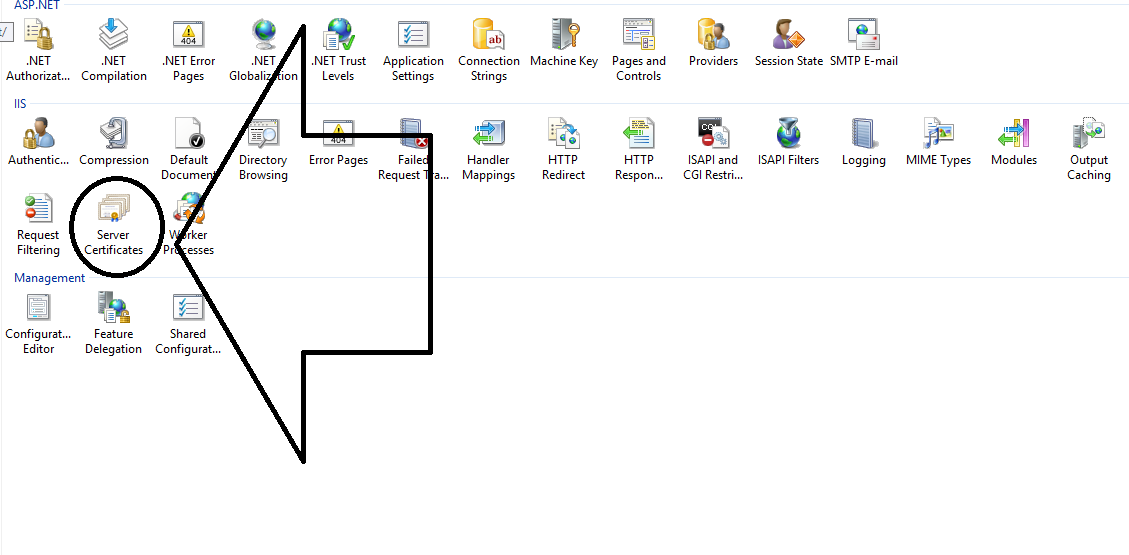 Step 2
In IIS manager go to Server Certificates and right click Create Self-Signed Certificate, select a friendly name and choose certificate store Personal
Step 3
Launch MMC (type mmc.exe in the Windows search bar using administrative account)
Step 4
Go to File -> Add / Remove Snap-in -> Select Certificates -> choose Computer Account and Local Computer
Step 5
Grant SQL Server rights to read the private key for the certificate.
In MMC, go to Certificates (Local computer) -> Personal -> Certificates
The certificate created in Step 2 should be listed there. Right click on thins -> All Tasks -> Manage Private Keys -> Add the service account for your instance of SQL Server -> Give it the service account Read permissions
Step 6
Configure SQL Server to use this certificate
Start SQL Server Configuration Manager -> Go to SQL Server Network configuration -> Select your instance -> Right-click > Properties > Certificate tab -> Choose the certificate you have created in Step 2
Step 7
Restart the service
Linkografia
Changing SQL Server Collation After Installation
Using a self-signed SSL certificate with SQL Server
 Follow